Medically reviewed by Dt. Alp Erdem, DDS — Oral & Maxillofacial Surgery — Last reviewed July 2026
All-on-4 and All-on-6 Full-Mouth Implants: A Complete Guide
A complete guide to All-on-4 and All-on-6 full-mouth implants: candidacy, surgery, healing timeline, and long-term maintenance explained.

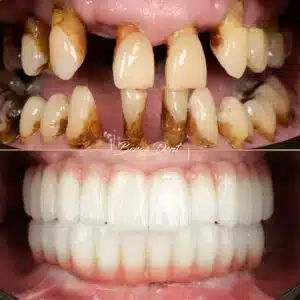
Losing most or all of the teeth in the upper or lower jaw is far more than a cosmetic problem — it affects chewing function, social confidence, and psychological well-being. Traditional removable dentures come with real limitations: reduced bite force, ongoing irritation of the supporting gum tissue, and the constant risk of slipping while eating or speaking.
Over the past two decades, advances in implant dentistry have made All-on-4 and All-on-6 reliable, well-documented treatment options for both clinicians and patients. Both approaches use a fixed prosthesis supported by just four or six strategically placed implants, aiming to restore function with a minimal number of implants.
This guide walks through the anatomical and biomechanical principles behind All-on-4 and All-on-6 treatment, patient selection criteria, surgical and prosthetic design, the healing timeline, and the long-term maintenance that successful outcomes depend on.
The information reflects current implant dentistry literature and clinical practice; even so, every treatment plan should be individualized after an in-person evaluation.
Fundamental Concepts
Osseointegration: Biological Fusion
Osseointegration is the process by which an implant surface forms a direct biological bond with the surrounding bone. After placement, bone-forming cells (osteoblasts) attach to the implant surface, lay down new bone matrix, and create microscopic mechanical interlocking between the titanium implant and the bone. This process happens in two stages:
- Primary Stability: the mechanical stability achieved from the insertion torque during surgery.
- Secondary Stability: the biological stability that develops through osseointegration, typically over 3–6 months.
This distinction is central to decisions about immediate loading.
Implant Stability and ISQ Values
Implant stability can be measured chairside with a resonance-frequency device that produces an ISQ (Implant Stability Quotient) reading. ISQ values range from 0–100:
- ISQ 55 and above: generally considered adequate stability for immediate loading.
- ISQ 50–55 range: a borderline zone in which the clinician weighs bone quality and implant diameter before deciding.
- Below ISQ 50: delayed loading is generally preferred.
ISQ is a useful objective measure, but it isn't the sole determinant of success — bone quality, implant design, and how chewing forces are distributed all matter as well.

What Are All-on-4 and All-on-6?
Definition and Core Principle
All-on-4 and All-on-6 are treatment concepts built around supporting a full dental arch with a minimal number of implants. The key difference is implant count:
- All-on-4: four implants placed in an angulated configuration, with the posterior pair tilted.
- All-on-6: six implants arranged for broader support.
Both approaches deliver a fixed prosthesis that the patient cannot remove — only the dentist removes it, during maintenance visits.
Biomechanical Design: Angulated Implants
The innovation behind All-on-4 lies in the tilted placement of the posterior implants:
- Anterior Implants: placed vertically to support the incisors and canines.
- Posterior Implants: angled 30–45 degrees distally, moving them further back in the jaw and helping resist forward chewing forces.
This tilting strategy:
- Can reduce the need for bone grafting in cases of limited bone volume
- Increases the distance between implants, shortening the cantilever span of the prosthesis
- Distributes chewing forces into the bone more favorably from a biomechanical standpoint

Anatomical and Biomechanical Foundations
Bone Quality Classification (Lekholm-Zarb)
Implant success correlates directly with bone density and structure. The Lekholm-Zarb system groups bone quality into four types:
- Type I — Description: Dense, largely homogeneous cortical bone — Healing Time: 3–4 months — Suitability for Immediate Loading: Most suitable
- Type II — Description: Thick cortical layer surrounding dense trabecular bone — Healing Time: 4–6 months — Suitability for Immediate Loading: Suitable
- Type III — Description: Thin cortical layer, dense trabecular bone — Healing Time: 5–8 months — Suitability for Immediate Loading: Borderline
- Type IV — Description: Thin cortical layer, low-density trabecular bone — Healing Time: 8–12 months — Suitability for Immediate Loading: Generally not suitable
Patients who lost their teeth years earlier and wore removable dentures in the meantime often show more advanced bone resorption, which can place them in a lower bone-quality category — extending healing time and increasing the risk associated with immediate loading.
Critical Anatomical Structures and Nerve Protection
Planning for All-on-4 and All-on-6 must account for and protect:
- Inferior Alveolar Nerve (IAN): supplies sensation to the lower jaw and chin. Protecting it from surgical trauma is critical, and three-dimensional imaging is essential given how much its course can vary between patients.
- Circumferential (Peripheral) Arteries: supply blood to the implant site; excessive distal tilting can risk injuring them.
- Vascular Plexus: the anterior mandible contains a network of small veins that calls for a careful surgical approach.
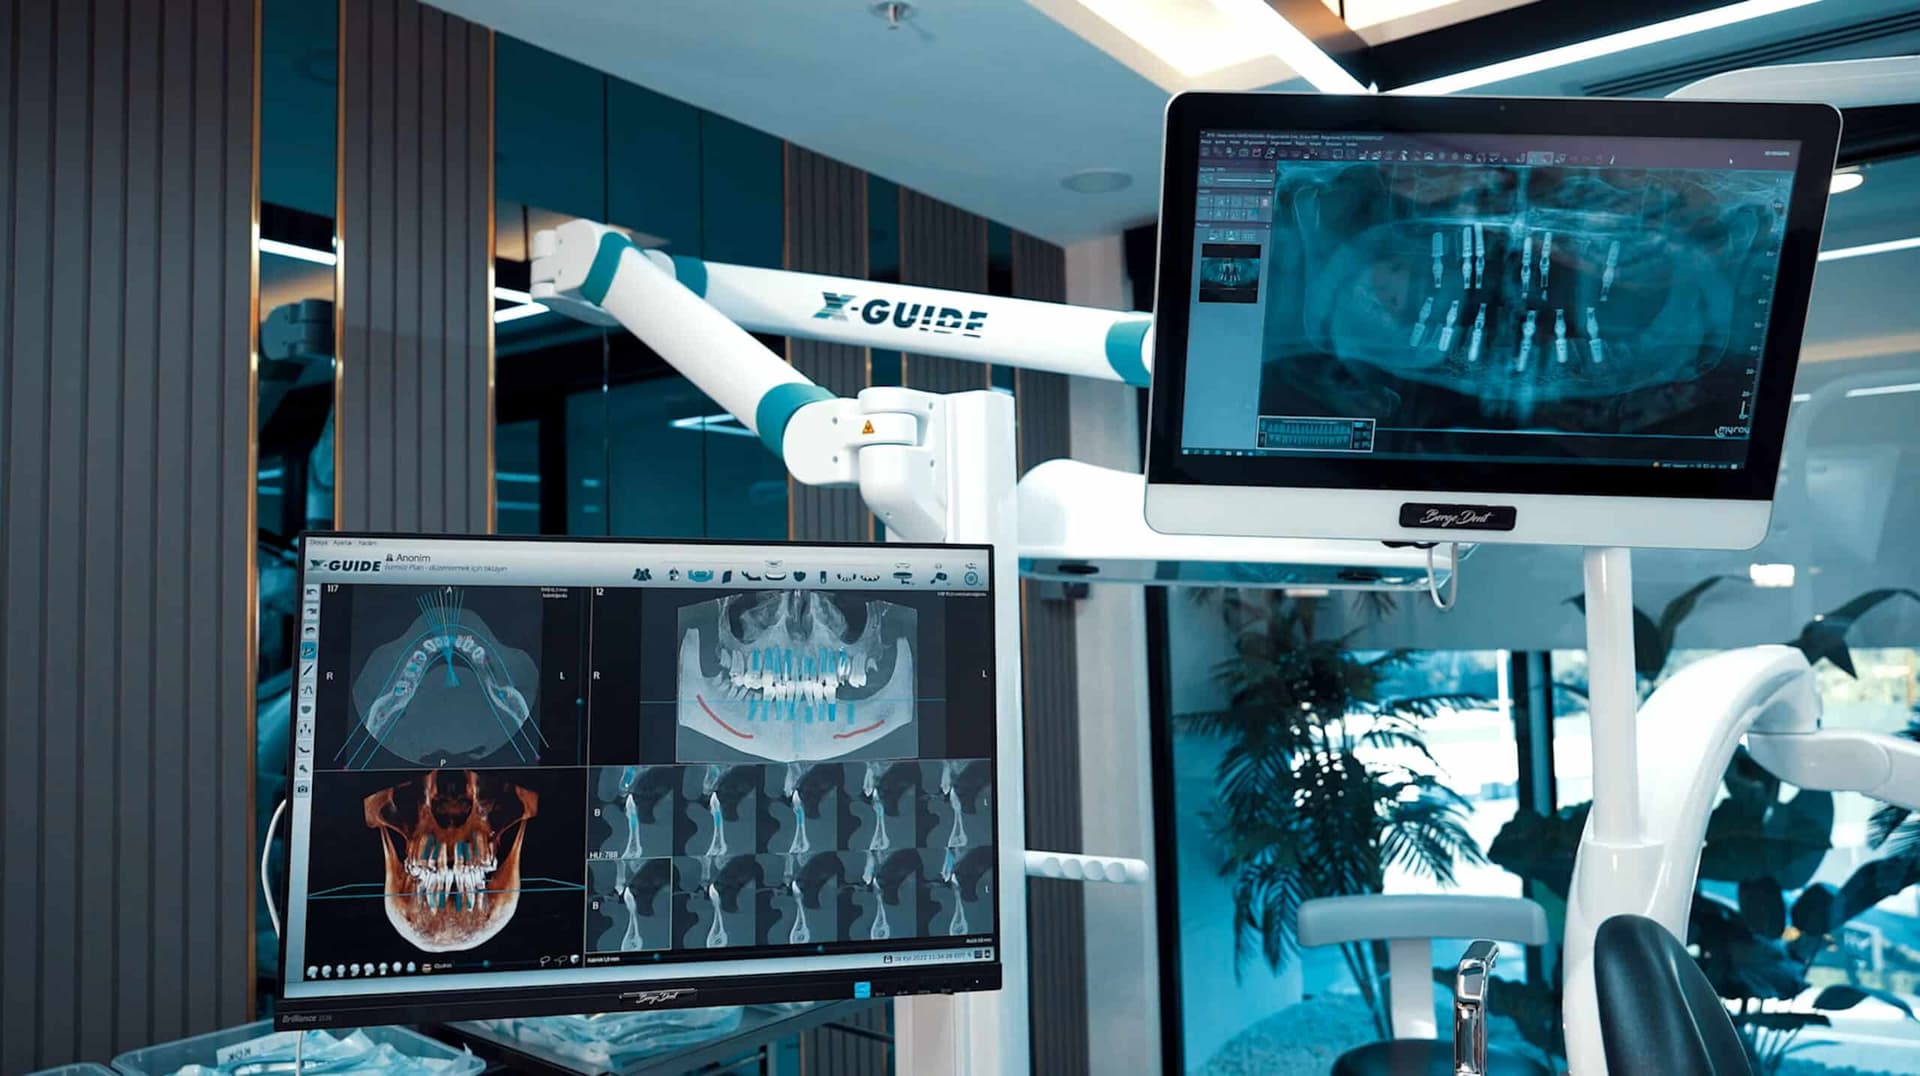
CBCT (Cone Beam Computed Tomography) provides precise three-dimensional visualization of these structures and forms the safe foundation for implant planning.

Patient Selection Criteria
Success with All-on-4 and All-on-6 depends on several factors working together. None of these are rigid rules — every patient is evaluated individually based on clinical and radiographic findings.
1. Extent and Nature of Tooth Loss
- Complete or near-complete tooth loss (or remaining teeth so compromised that extraction is planned)
- A single missing tooth or a few missing teeth do not justify this more invasive approach; individual implants are usually the better fit
- If healthy natural teeth need to be preserved, the treatment plan is adjusted accordingly
2. Bone Quality and Volume (3D Assessment)
CBCT Analysis:
- Clinicians generally look for at least 10 mm of vertical bone height and 5–6 mm of width at implant sites
- The anterior mandible usually has better bone quality (Type I–II); the posterior regions can be less favorable
- If the maxillary sinus extends low into the posterior jaw, a tilted implant may encroach on it, which can call for additional grafting (sinus lift)
Options When Bone Volume Is Limited:
- Minor volume deficiency → often addressed by adjusting implant angulation
- Moderate to advanced deficiency → grafting (bone graft, sinus lift) may be done before or at the same time as implant placement, typically adding 4–6 months to the timeline
3. Oral Hygiene Habits
Long-term implant success depends heavily on the patient's day-to-day maintenance:
- Motivation: will the patient reliably clean between the implants and keep up with dental visits?
- Physical Capability: older patients or those with limited motor control (from stroke, arthritis, etc.) may find daily cleaning more difficult
- Hygiene History: patients who neglected hygiene while wearing removable dentures face a higher risk of peri-implantitis
4. Systemic Health Status
Well-controlled chronic conditions (hypertension, diabetes, heart disease) generally do not rule out treatment. That said:
- Uncontrolled Diabetes: slows bone healing and raises infection risk; clinicians typically aim for an HbA1c below 7%
- Immunosuppressive Conditions: conditions such as HIV, or long-term use of corticosteroids, can raise osseointegration risk
- Bisphosphonate Therapy (Osteoporosis, Bone Metastases): carries a small but real risk of bisphosphonate-related osteonecrosis of the jaw (BRONJ); coordination between the dentist and the prescribing physician (oncologist/rheumatologist) is needed
- Heavy Smoking: slows osseointegration and is associated with a substantially higher risk of implant failure
5. Psychological Readiness and Expectation Management
- If a patient expects "teeth the same day and then I'm completely done," that expectation needs to be corrected before treatment begins
- Clinical success and patient satisfaction do not always align; a gap between expectations and reality can create problems later
6. Age and Jaw Development
- Jaw bone growth is generally complete by ages 18–20 in males and 16–18 in females
- Because bone is still actively developing during adolescence, implant outcomes in younger patients are less predictable; adult patients tend to show higher success rates
Role of Radiography and 3D Imaging
Why Is CBCT Necessary?
- Implant Planning: sagittal, coronal, and axial views together create a complete anatomical map
- Bone Quality Assessment: Hounsfield Unit (HU) measurements help quantify bone density
- Nerve Protection: the path of the inferior alveolar canal, mental foramen, and other landmarks becomes clear
- Prosthesis Design: CAD/CAM systems use CBCT data to model abutments and implant positions in three dimensions

Comparison with Traditional Implant Approach
Individual Implant Approach (Conventional)
The traditional method places one implant per missing tooth or group of teeth:
Timeline and Process:
- A fully edentulous arch may require 8–12 implants
- Usually done in two stages: surgical placement → a 3–6 month healing period → prosthesis fabrication
- Individual crowns or fixed bridges, which the dentist can remove and service as needed
Advantages:
- Broader support base → generally greater chewing force in the back of the mouth
- More anatomically precise, tooth-by-tooth replacement
- A biomechanically more even distribution of load (especially with 10 or more implants)
Disadvantages:
- More implants mean more extensive surgery, longer appointments, and higher overall cost
- Greater likelihood that bone grafting will be needed
- Requires more from the patient in terms of time and tolerance
All-on-4/All-on-6 Approach (Minimal-Implant Strategy)
Timeline and Process:
- Just 4–6 strategically placed implants, usually completed in a single surgical session
- With adequate stability, a provisional prosthesis can often be fitted the same day
- A fixed prosthesis that the patient cannot remove
Advantages:
- Time Efficiency: one surgery, one round of anesthesia, and a shorter operative time, which supports faster recovery
- Reduced Grafting Need: angled implant placement can defer or reduce the need for grafting, though not in every case
- Faster Return to Function: early healing paired with a same-day provisional prosthesis
- Easier Maintenance: a fixed prosthesis is generally easier to keep clean than a removable denture, and it stays more consistently stable
Disadvantages:
- Cantilever Effect: support for the back teeth can be limited, which restricts posterior chewing force to some degree
- Technical Complexity: angled placement, nerve and vessel mapping, and biomechanical balancing require an experienced clinician
- Load per Implant: because just four implants carry the entire arch, each one bears a substantial load — if one fails to integrate, the whole prosthesis is affected

Immediate Loading: Theory and Practice
Definition: Immediate vs. Delayed Loading
Immediate Loading (Immediate Function):
- The prosthesis is placed the same day (within hours) or very shortly after implant surgery (1–2 days)
Delayed Loading:
- The prosthesis is placed 3–6 months after implant surgery, generally once osseointegration is largely complete
The Evidence Behind Immediate Loading
Immediate loading has an established track record in controlled clinical settings over the past two decades. Its success depends on:
- Implant Stability (Primary Stability): an ISQ of 55 or higher and insertion torque of at least 35 Ncm are generally considered favorable
- Bone Quality: Type I–II bone is more favorable; Type III–IV carries more risk
- Prosthesis Design: an overdenture or a design with mechanical locking mechanisms tolerates a bit more micromovement; a fully rigid fixed prosthesis demands greater initial stability
- Force Distribution: a cantilevered design (back teeth extending beyond the implants) creates higher leverage forces, which raises the risk associated with immediate loading
"Same-Day Teeth" — Setting Realistic Expectations
This is probably the most misunderstood part of All-on-4/6 marketing. To be clear:
What's True:
- A provisional prosthesis can typically be placed the same day or within a couple of days
- The patient doesn't leave the office without teeth, which offers real psychological and social comfort
Common Misconceptions:
- "Treatment is finished, everything's done" — Not quite. The provisional prosthesis is a placeholder until osseointegration is complete. Adjustments, pressure-point relief, and sensitivity checks are common in the first month
- "I can chew hard food right away" — No. A soft diet is needed for the first few weeks; the provisional has real stability limits
- "Once it's in, it stays exactly the same" — No. The provisional is worn for a few months; the final prosthesis is a complete redesign
Is Immediate Loading Always an Option?
Generally suitable for immediate loading:
- Type I–II bone quality
- ISQ of 55 or above
- A patient who shows strong hygiene motivation and follow-through
- A surgeon and lab team experienced with immediate loading
Generally not suitable:
- Type III–IV bone quality
- ISQ below 50
- Extensive bone grafting done at the same time (graft survival can compromise implant stability)
- Immunosuppressive conditions or aggressive periodontitis
In these situations, delayed loading is usually the safer path. The implants are left to osseointegrate undisturbed for 3–6 months without chewing loads, while the patient wears a removable provisional or their existing denture in the meantime.

Surgical Protocol and Procedure Details
Pre-Operative Preparation and Sterilization
Pre-Operative Assessment:
- A final review of the CBCT scan, with implant positions simulated in planning software (surgical guide design)
- Lab work (hemoglobin, blood glucose, clotting time)
- Antibiotic prophylaxis (typically amoxicillin, 2–3 g, or a cephalosporin, given about an hour before surgery)
- Good nutrition and hydration beforehand; fasting for 6 hours before surgery if general anesthesia is planned
Oral Hygiene:
- Thorough brushing and flossing the night before and the morning of surgery
- Antiseptic rinse (0.12% chlorhexidine)
- The surgical site is cleaned and prepped antiseptically
Surgical Technique: Step by Step
1. Anesthesia
- Local anesthesia (lidocaine with epinephrine) or general anesthesia, which is often preferred for anxious patients or those with certain medical needs
- Local anesthesia typically involves an inferior alveolar nerve block, buccal infiltration, and intraseptal injections as needed
2. Incision and Flap Management
- An incision is made through the gingiva to expose the alveolar bone
- The flap is elevated carefully to avoid soft-tissue and nerve damage
3. Implant Socket Preparation (Drilling Sequence)
- At the planned sites (per the CBCT scan and surgical guide), the bone is prepared with a sequence of graduated burs
- Sequence:
- Pilot Drill (2 mm): establishes the initial direction
- Widening Drills (4, 6, 8 mm, etc.): progressively enlarge the site to the implant diameter
- Tapping (Optional): in dense bone, a threaded tap may be used to pre-cut bone threads
Continuous water cooling is essential during drilling — excessive heat (above roughly 47°C) can damage bone.
4. Implant Placement
- The titanium implant (typically 4–6 mm in diameter and 10–12 mm or longer) is positioned at the planned site
- Torque Control: the implant is seated to a specific insertion torque (typically 35–50 Ncm). Too much torque can traumatize bone; too little compromises stability
- Angled Implants (the All-on-4 Hallmark): posterior implants are placed 30–45 degrees distally, tilted mesially or distally depending on the patient's anatomy
5. Abutment Selection
- An abutment — the connector between the implant and the prosthesis — is attached to the implant head
- For Tilted Implants: angled abutments (with 15–25 degrees of correction) let the restoring teeth sit in the correct position despite the implant's angle
6. Provisional Prosthesis Placement (If Immediate Loading Is Planned)
- A provisional prosthesis, prepared in advance by the lab, is tried in and adjusted on the implants/abutments (fit check, bite verification)
- It is shaped and secured with fast-curing acrylic resin
- Pressure points are identified and relieved, and heavy bite contacts are adjusted
7. Suturing
- The soft-tissue flaps are closed with absorbable or non-absorbable sutures
- The goal is to stabilize the flap margin at the right level
Post-Operative Instructions
- Rest: limit activity; apply cold compresses (about 15 minutes per hour) for the first 24 hours
- Oral Hygiene: avoid brushing directly over the surgical site; rinse gently with saline or lukewarm salt water instead
- Medications: pain relief (acetaminophen, ibuprofen, or codeine if prescribed), antibiotics (oral amoxicillin for 3–4 days), and any rinse your dentist recommends
- Diet: soft, lukewarm foods (soup, pudding, yogurt); avoid hard, very hot, and alcoholic items for 1–2 weeks
Healing Process: Step-by-Step Guide
0–24 Hours: Immediate Post-Op Phase
Physiology:
- Surgical trauma triggers acute inflammation
- Early bone healing begins as inflammatory cytokines (IL-1, TNF-α) are released
Clinical Findings:
- Swelling (Edema): typically peaks within 6–12 hours; facial symmetry can be affected, especially in the anterior region
- Sensitivity: once the anesthesia wears off, some pressure and mild discomfort are normal
- Bleeding: minor bleeding may occur in the first 2–4 hours; a warm salt-water rinse usually helps
Patient Instructions:
- Keep the head elevated while resting to reduce swelling
- Ice pack for the first 24 hours, about 15 minutes per hour (switch to warm compresses afterward)
- Rest, with no strenuous activity
- Having someone available to help and keep an eye on you is a good idea
1–7 Days: Acute Inflammation Phase
Physiology:
- Neutrophils and macrophages clear damaged tissue
- Angiogenesis (new blood vessel formation) begins
- Early bone formation (soft callus) gets underway
Clinical:
- Swelling: decreases day by day, though some may still be visible on days 3–5
- Pressure Points: the provisional prosthesis may develop pressure spots; the first follow-up (24–48 hours after surgery) usually includes adjustments
- Pain: usually most intense on day one and eases after that; prescribed pain relievers are typically sufficient
- Gum Margin: appears thick, bluish-red, and swollen — a normal part of the inflammatory response
Patient Instructions:
- After the first 24 hours, rinse with warm salt water (morning, evening, and after meals — 3–4 times a day)
- Do not brush directly over the surgical site
- If wearing a provisional prosthesis, check pressure points frequently (a checkup around days 2–3 is ideal, with 2–3 more within the week)
- Take antibiotics and pain medication as prescribed
- Stay on a soft diet
1–3 Months: Bone Healing and Osseointegration Phase
Physiology:
- Soft callus gradually becomes mineralized (hard callus), then remodels into lamellar bone
- Growth factors, including bone morphogenetic proteins (BMPs), drive new bone formation
- This is the most critical window for osseointegration, as osteoblasts settle onto the implant surface and lay down new bone
- Bone-to-implant contact becomes measurable at a microscopic level after about 3–4 weeks
- By 6–8 weeks, osseointegration is often clinically apparent through increased implant stability
Clinical:
- Edema: largely resolved, though minor swelling can linger at the surgical site
- Prosthesis Adjustment: bone remodeling continues (especially in the first 4 weeks), which changes how the prosthesis fits and where pressure points fall — regular adjustment visits (around weeks 2, 4, and 8) are typically needed
- Sensitivity: generally drops to minimal levels within 2–3 weeks
- Taste/Smell Perception: if the palate is left uncovered (an open palatal design), taste and warmth sensation return — a change that patients coming from removable dentures often welcome
- Diet: by week 2, soft-cooked vegetables, fish, and poultry are usually fine; hard, sticky, and raw foods are still best avoided
Dentist Checkups:
- Week 1: pressure-point check, monitoring swelling, oral hygiene instruction
- Week 4: prosthesis adjustment as needed, healing assessment (an optional periapical X-ray)
- 8–12 Weeks: osseointegration check, planning for the final prosthesis phase
3–6 Months: Osseointegration Maturation
Physiology:
- Osseointegration is largely complete, with a direct bond between implant and bone
- Lamellar bone remodeling stabilizes, and the rate of bone turnover slows
- Peri-implant tissues (gum and supporting bone) settle into a stable state
Clinical:
- Stability: the implant is firmly fixed, with no movement during speech or eating
- Prosthesis Design: work begins on the final prosthesis design and fabrication
- Diet: medium-firm foods (cheese, bread, cooked vegetables) are generally well tolerated; very hard foods (nuts, hard candy) and sticky or raw foods are still best avoided
- Ongoing Care: coordination among the restorative dentist, periodontist, and prosthodontist as needed
6–12 Months: Final Prosthesis Phase Begins
The provisional prosthesis is removed once the final prosthesis is ready. See Transition to Final Prosthesis.
Provisional Prosthesis: Design and Management
Design
The provisional (interim) prosthesis is typically made from acrylic resin (PMMA) and attached to the implants/abutments with either a screw or adhesive.
Fabrication:
- The lab designs it before surgery, based on diagnostic models, so it is ready when the implants are placed
- CBCT data guides the design, whether through CAD/CAM or manual shaping
- The crown contours are shaped, and the screw-access holes are positioned correctly
Materials:
- Acrylic (PMMA): sets quickly, easy to adjust, inexpensive, but more prone to fracture
- Composite Resin: more durable, with some aesthetic limitations
- Bis-Acrylic Composite: resistant to wear, available in many shades
Functional Limitations
- Chewing Force: roughly 30–40% of what natural teeth can generate
- Staining: tea, coffee, and red wine can stain the material over time
- Wear: biting surfaces flatten and incisal edges round off with use
- Fracture Risk: a hard impact or drop can break the prosthesis
Maintenance and Adjustments
Daily Cleaning:
- Soft toothbrush and a low-abrasion toothpaste
- Brush gently around the implant area, especially near the screw-access holes
- Salt-water rinses
Dentist Checkups (Frequent Early On):
- Week 1: identify and relieve pressure points (using a bur or finishing tool)
- Week 4: re-adjust as bone remodeling continues
- 8–12 Weeks: final adjustments before taking impressions for the final prosthesis
- Screw Tightness: if screw-retained, tightness is checked periodically (roughly every 6 months, or as your dentist advises)

Transition to Final Prosthesis
Timing and Conditions
Before starting on the final prosthesis, the dentist typically confirms:
- Adequate Osseointegration: usually 3–6 months after surgery, depending on bone quality, age, and overall health
- Bone Remodeling Has Slowed: once the initial rapid resorption has settled down, the prosthesis can be designed against more stable anatomy
- Good Oral Hygiene: if hygiene has been well maintained through the provisional phase, bacterial load is lower
- No Active Complications: no pain, infection, or implant instability
Final Prosthesis Design Phases
1. Impression Taking
- Open Tray Technique: transfer copings are left exposed, the impression is taken, and the copings come out with the impression for lab processing
- Closed Tray Technique: the abutment stays on the implant; impression posts are captured and then removed from the mouth before the tray comes out
- Coordination: the dentist and prosthodontist confirm implant position, gum contour, and prosthesis design together
2. Model Preparation
- Laboratory: a stone or digital (CAD/CAM) model is created from the impression
- Implant Analog Placement: an implant analog — a replica of the implant — is secured in the exact position captured in the impression
3. Occlusal (Bite) Record
- Centric Relation: the jaw's natural closing position is recorded with bite registration material or wax. This step matters even more for All-on-4 prostheses, since incorrect occlusion can amplify cantilever forces
- Vertical Dimension: the dentist selects the appropriate bite height — usually referencing the provisional — weighing both appearance and function
4. Tooth Selection
- Color: shade is matched using a shade guide or natural tooth samples and checked for a natural blend
- Shape: facial structure, lip fullness, and age-appropriate contours all guide the choice
- Size: molar width and anterior tooth dimensions are selected, whether from stock options or custom-made
5. Try-In Phase (Bisque Bake)
- The lab delivers a pre-glazed (bisque) version of the prosthesis for evaluation
- The Dentist Checks:
- Fit: do the abutment components seat correctly on the implant heads?
- Occlusion: is the bite balanced? Are anterior and posterior contacts even? Are cantilever forces balanced?
- Function: how does the patient speak and chew, even with a non-final prosthesis? Does it move at all?
- Aesthetics: do the teeth, lips, and facial symmetry look right together?
Once adjustments are made, the prosthesis goes back for final glazing.
6. Final Delivery and Cementation
- The finished ceramic or acrylic prosthesis is attached to the implant heads, either screw-retained or cement-retained
- Screw-Retained: a channel through the implant head allows the prosthesis to be screwed in place. Advantage: easy to retrieve if needed. Disadvantage: the screw-access covers can have some aesthetic limitations
- Cement-Retained: the abutment is screwed to the implant, and the prosthesis is cemented onto the abutment (typically more natural-looking). Disadvantage: excess cement left around the implant can trigger inflammation — a documented but relatively minor risk
Final Occlusal Check:
- Articulating paper marks the contact points
- Centric closure and side-to-side/grinding movements are checked
- Heavy or premature contacts are adjusted
7. Patient Education
- Daily Cleaning: soft brush, implant-specific floss, interdental brushes
- Foods to Avoid: hard candy, nuts, and other hard or sticky foods
- Follow-Up Schedule: monthly for the first 3 months, then every 6 months, then annually

Prosthetic Materials and Options
1. Acrylic (PMMA) Resin Prosthesis
Properties:
- Aesthetics: good — can be tinted with controlled translucency
- Durability: moderate; wears over time and is more prone to fracture
- Lifespan: roughly 5–10 years, depending on maintenance
- Cost: lower than other options
- Repair: straightforward — the lab can bond and repair most breaks
Disadvantages:
- Can discolor over time
- Wears and can crack under hard foods
- More prone to biofilm buildup, so regular professional cleaning matters
2. Zirconia Ceramic Prosthesis
Properties:
- Durability: very high — among the strongest ceramic options
- Aesthetics: strong optical resemblance to natural teeth
- Color Stability: excellent, staying consistent for years
- Biocompatibility: excellent, with favorable soft-tissue response
- Lifespan: often 15+ years, though long-term data continues to accumulate
- Cost: higher, typically several times the cost of acrylic
Disadvantages:
- Monolithic zirconia can look somewhat flat or opaque when aesthetic expectations are very high; a zirconia base with a layered ceramic veneer looks more natural but is more prone to chipping, similar to traditional ceramic
- Repairs are difficult; a fracture often means replacing the whole prosthesis
- Requires CAD/CAM and sintering technology in the lab
3. Hybrid Prosthesis (Metal/Zirconia Base with Acrylic or Ceramic Veneer)
Properties:
- Substructure: titanium alloy, zirconia, or a nickel-chromium alloy
- Veneer: acrylic or ceramic teeth layered over the base
- Durability: good — the substructure provides mechanical strength beneath the veneer
- Aesthetics: moderate to good, with the veneer masking the base material
- Lifespan: typically 10–15 years
- Repair: if the veneer chips, it can usually be repaired or replaced; the substructure rarely fails
- Cost: moderate — more than acrylic, less than monolithic zirconia
Why Patients Choose This Option:
- A good balance of a strong base with solid aesthetics
- For patients who eat very hard foods regularly, the substructure adds a layer of mechanical protection
4. CAD/CAM Acrylic-Ceramic Hybrid (Polymer Hybrid)
A newer class of materials (e.g., VITA ENAMIC, Shofu HC):
- Properties: ceramic particles embedded in a resin matrix, combining durability with a more natural look
- Advantages: softer than solid ceramic (less stress transmitted to the implant) while still looking ceramic-like
- Disadvantages: less color-stable than ceramic over time; easier to repair, but long-term durability data is still limited

Advantages: Evidence-Based Benefits
1. Mechanical Stability and Function
Fixed Prosthesis Advantages:
- No Movement: unlike a removable denture, a fixed prosthesis does not shift
- Speech Comfort: because it does not interfere with tongue movement, speech tends to sound more natural and clear
- Chewing Efficiency: distributed across four to six implants, chewing efficiency with a fixed implant prosthesis is generally reported to be considerably higher than with removable dentures — commonly cited figures suggest an improvement in the range of 60–70%, while still restoring only a fraction (often cited around 30%) of natural chewing force
2. Bone Stimulation and Slowed Resorption
- Implant Loading: implants transmit chewing forces directly into the bone through osseointegration
- Bone Density: bone that receives this stimulation tends to maintain higher density than bone beneath an unloaded removable denture
- Resorption Rate: research commonly cites unstimulated bone under a removable denture resorbing at roughly 5–8% per year, compared with approximately 1–2% per year for bone supporting an implant
3. Social Confidence and Quality of Life
Several studies report that patients with a fixed implant prosthesis tend to describe higher satisfaction than removable denture wearers when it comes to:
- Confidence smiling
- Comfort eating in social settings, without worrying about the prosthesis moving
- Confidence speaking, without concern about a denture shifting
4. Palatal Sensation (for Upper Arch)
Upper-arch prostheses are often designed with an open palate (no covering over the roof of the mouth), which preserves natural warmth and taste sensation. Patients coming from a removable denture tend to notice and appreciate this difference the most.
5. Shorter Operative Time
All-on-4/All-on-6 typically means one surgery lasting around 2–3 hours, compared with a traditional multi-implant approach that often takes 2–3 separate sessions totaling 4–6 hours. Benefits of a single session include:
- Lower cumulative anesthesia exposure
- A faster overall healing timeline
- Less physical demand on the patient, which matters for older or medically complex patients

Limitations and Technical Challenges
1. Cantilever Design
The entire premise of All-on-4 rests on spanning a full arch with a small number of implants. As a result, the back teeth (molars and premolars) extend beyond where the implants are anchored, which creates some mechanical challenges:
- Increased Moment Arm: chewing force applied far from the implant creates a turning moment that concentrates stress at the implant head
- Bone Stress: cantilevered teeth transmit disproportionately high stress to the surrounding bone
- Screw Loosening Risk: in screw-retained prostheses, cantilever forces raise the risk of screws loosening over time
Management Strategies:
- Shortening the cantilever (ending at the premolar rather than the molar) or moving to All-on-6 for a broader support base
- Biomechanical planning using finite element analysis (FEA) simulations
2. Bone Adequacy: Grafting Isn't Always Avoidable
A common misconception holds that tilted implants eliminate the need for bone grafting. That is not accurate:
- Advanced Bone Loss: significant vertical or horizontal bone loss (for example, less than 5 mm of height) can exceed what angulation alone can compensate for, and the surrounding nerve and vessel anatomy may leave little room to maneuver
- Maxillary Sinus Consideration: if the posterior maxilla is narrow or short, a tilted implant may encroach on the sinus, requiring sinus grafting (sinus augmentation)
Bottom Line: grafting is often deferred, or its scope reduced, but it is not eliminated altogether.
3. Clinician Experience Requirement
Angled implant placement, nerve and vessel protection, and fixed-prosthesis design are considerably more demanding than routine implant work. In less experienced hands, potential complications include:
- Anatomical errors (nerve injury, sinus perforation)
- Implant positioning errors (too much tilt risks failed osseointegration; too little leaves an unsupported cantilever and mechanical problems)
- Prosthesis design errors (unbalanced occlusion, screws loosening)
Practical Takeaway: look for a clinician with specific training and experience in full-arch implant treatment.
4. Provisional Prosthesis Phase Challenges
- Frequent Adjustments: ongoing bone remodeling means the fit changes fairly quickly, requiring several follow-up visits
- Aesthetic Gaps: the provisional isn't as refined as the final prosthesis, which can be disappointing for some patients
- Dietary Restrictions: the soft-diet requirement in the early months can be frustrating

Risks and Potential Complications
Intra-Operative Complications
1. Nerve Injury
- Inferior Alveolar Nerve (IAN) Injury: trauma from drilling can cause swelling that leads to temporary numbness (paresthesia) or, less commonly, permanent sensory loss
- Mental Nerve Injury: if anterior implants are placed too close to the mental foramen, sensation in the lower lip or chin can be affected
- Lingual Nerve Injury: can cause numbness in the floor of the mouth or tongue
- Frequency: relatively uncommon (studies cite roughly 0.5–2%); CBCT planning and surgical guides help minimize this risk
- Management: most cases resolve on their own within 3–6 months; if sensation doesn't return, referral for evaluation of nerve regeneration options is considered
2. Vessel Injury
- Bleeding: vascular trauma during surgery is usually controlled with standard hemostatic measures
- Hematoma: if bleeding isn't fully controlled, a larger hematoma can form, prolonging swelling, pain, and recovery
- Frequency: uncommon (roughly 1–3%) and usually minor and self-limiting
3. Sinus Perforation (Maxilla)
- In the posterior upper jaw, if an implant is placed deeper than the available bone allows, it can breach the sinus floor
- Consequence: raises the risk of infection or sinus inflammation
- Treatment: small perforations are typically covered with a collagen membrane or a bioadhesive such as fibrin glue
4. Post-Operative Infection
- Infection at the surgical site (commonly staphylococcus or streptococcus species)
- Management: antibiotics along with warm compresses
- Frequency: uncommon (roughly 1–2%); antibiotic prophylaxis helps reduce this risk
Post-Operative Complications
1. Failed Osseointegration
- Cause: poor bone quality, smoking, underlying systemic disease, or infection
- Symptoms: the implant feels loose or shifts; patients often describe it as a "wiggling" sensation
- Timeline: usually becomes apparent within 3–6 months
- Management: removing and repositioning the implant if feasible, or considering alternatives such as additional implants or a removable prosthesis
- Frequency: with good patient selection and technique, this is reported at under 5%; in less favorable conditions, it can run higher, around 5–10%
2. Peri-Implantitis (Implant-Surrounding Bone Disease)
- Inflammation of the bone and gum tissue around the implant — essentially the implant equivalent of gum disease
- Cause: poor oral hygiene and bacterial biofilm buildup
- Symptoms: redness, swelling, discomfort, and bone loss around the implant visible on X-ray
- Management: regular professional cleaning and, when needed, antibiotics; more advanced cases may require surgical treatment and bone grafting
- Frequency: studies suggest a meaningful proportion of patients, commonly cited in the 10–20% range, may develop some degree of peri-implantitis over time, which underscores the importance of consistent long-term care
3. Screw Loosening (Screw-Retained Prosthesis)
- The prosthesis screw can loosen over time, particularly under cantilever stress
- Symptoms: slight movement of the prosthesis, or a clicking sound
- Management: the screw is simply re-tightened
- Frequency: reported at roughly 5–15%, and it is typically caught and resolved at routine checkups
4. Prosthesis Fracture
- The provisional or final prosthesis can fracture under a hard impact or excessive chewing force
- Management: repaired or remade in the lab
- Prevention: patient counseling on avoiding very hard foods
5. Aesthetic Disappointment
- The color, shape, or overall look of the prosthesis doesn't fully match what the patient expected (inherently subjective)
- Management: setting clear expectations upfront and fine-tuning during the try-in phase
6. Severe/Rare Complications
Bone Infection (Osteomyelitis)
- A progressive infection of the bone around the implant
- Symptoms: significant pain, swelling, pus, fever
- Management: aggressive antibiotic therapy, with surgical debridement if needed
- Frequency: very rare (under 1%)
Mandibular Fracture
- Rare, and typically associated with extensive implant placement in an already weakened jaw
- Frequency: very rare; modern implant planning helps minimize this risk
Long-Term Maintenance and Implant Health
Long-term success with All-on-4/6 depends on consistent maintenance after treatment. Both the biological support (the bone and gum around each implant) and the mechanical integrity of the prosthesis need to be preserved to support many years of function.
Home Care Protocol
1. Mechanical Cleaning
- Soft Electric Toothbrush: lower vibration settings with soft bristles, angled gently around the implant abutments
- Implant-Specific Floss: standard floss is generally replaced with implant-specific floss, super floss, or a water flosser; keep floss away from the screw-access channel
- Interdental Brushes: thin, soft brushes (0.6–0.8 mm) clean around the sides of the abutment
- Fine-Tip Cleaners: thin brush tips can reach beneath the prosthesis and around the implant head
Frequency: at least morning and evening; ideally after each meal
2. Chemical Cleaning and Rinsing
- Chlorhexidine Rinse (0.12%): antibacterial, typically used for the first two weeks or as your dentist directs — extended use beyond two weeks can cause staining or altered taste
- Hydrogen Peroxide Rinse (1–3%): mildly antibacterial, with some mechanical cleaning benefit from the bubbling action
- Saline (Salt Water) Rinse: gentle and safe for daily use; helps calm inflamed tissue
Frequency: at least morning and evening; 3–4 times a day if being used to help manage peri-implantitis
3. Toothpaste Selection
- Abrasiveness: low to moderate (RDA under 100) — highly abrasive pastes can scratch abutment surfaces
- Fluoride: a standard fluoride toothpaste supports healthy peri-implant gum tissue
- Antibacterial Ingredients: pastes containing zinc or similar antibacterial agents can be helpful
Professional Cleaning and Dentist Visits
1. Cleaning Frequency
- Year 1: every 3–6 months, for professional removal of plaque and calculus above and below the gumline
- Years 2–5: every 6 months
- After Year 5: at least annually, though patients at higher risk of peri-implantitis often continue with 6-month visits
2. What a Dentist Visit Covers
- Implant Stability: a clinical check for any mobility at the implant heads
- Peri-Implant Bone: periapical or full-mouth X-rays (roughly every 6–12 months) to monitor for any progressive bone loss
- Peri-Implant Pockets: periodontal probing (a pocket depth of 4 mm or more warrants closer attention)
- Prosthesis Integrity: checking for cracks, fractures, or wear
- Screw Tightness: checked with a torque wrench for screw-retained prostheses
- Occlusal Check: articulating paper identifies contact points, and any excessive or premature contacts are adjusted
3. Peri-Implantitis Treatment (If Needed)
- Mild-to-Moderate Peri-Implantitis:
- Mechanical cleaning (ultrasonic scaling, specialized curettes), chemical treatment (chlorhexidine, peroxide), and antibiotics when indicated (local minocycline gel, or systemic amoxicillin plus metronidazole for about a week)
- Reinforcing the patient's home hygiene routine is a key part of treatment
- Severe Peri-Implantitis (Implant Loss Risk):
- Surgical intervention: reflecting the gum tissue around the implant, removing inflamed tissue, and grafting bone if needed
- Post-operative care: a strict hygiene routine, continued antibiotics, and close follow-up (every 2–3 weeks)
Prosthesis Replacement Timeline
Over time, prosthesis materials tend to:
- Discolor/Stain: acrylic over roughly 5–10 years; ceramic can hold its color for 15+ years
- Wear: biting surfaces flatten, which can reduce chewing efficiency
- Shift with Bone Changes: as jaw bone contours change over the years, the fit against the underlying bone can drift, creating gaps
Typical Replacement Timing:
- Aesthetic concerns (staining, wear) → roughly 5–10 years
- Mechanical concerns (loosening, fit issues) → roughly 10–15 years, depending on the prosthesis's condition
- Bone-related changes → 15+ years, sometimes requiring a full redesign
Common Misconceptions
Misconception 1: "It's One Day of Surgery, and Then Everything's Done"
Not accurate — marketing sometimes oversimplifies the process this way.
The Reality:
- What Actually Happens Same-Day: implant placement plus provisional prosthesis attachment, in one visit
- Full Timeline: 3–6 months for osseointegration, ongoing provisional adjustments, and then final prosthesis design and fabrication — typically 6–12 months in total
- Recovery Expectations: the idea that you'll leave surgery and be back to normal life the next day is not realistic. The early weeks involve activity restrictions, a soft diet, and several follow-up visits
Misconception 2: "Every Edentulous Patient Is a Candidate for All-on-4"
Not accurate — not everyone is an equally good fit.
The Reality:
- Bone Deficiency: Type IV bone with only around 5 mm of height makes All-on-4 considerably riskier; grafting and a longer timeline may be the better plan
- Systemic Conditions: uncontrolled diabetes, severe osteoporosis, bisphosphonate therapy, or immunosuppression may need to be addressed first, or may call for a different approach altogether
- Oral Hygiene: a history of severe periodontal disease combined with low motivation raises the risk of implant failure significantly — education and motivation matter as much as anatomy
Misconception 3: "The Prosthesis Lasts Forever"
Not accurate — it isn't a one-and-done restoration.
The Reality:
- Material Wear: acrylic typically needs replacing within 5–10 years; ceramic can last 15+ years
- Bone Changes: jaw bone shape continues to shift over the years, which eventually affects prosthesis fit and calls for a new design
- Biology Doesn't Stop: even with excellent implant health, bone remodeling continues — good care slows it, but doesn't stop it entirely
Misconception 4: "Modern Technology Means No Pain"
Not accurate — even with advanced technique, some discomfort is expected.
The Reality:
- During Surgery: local anesthesia prevents pain, but pressure and vibration are still felt, and some anxiety is normal
- Right After Surgery: the first day or two typically involve some pain and tenderness, and pain medication is usually needed
- Early Weeks: mild swelling and discomfort are normal; expecting zero pain isn't realistic
Misconception 5: "It's Guaranteed to Succeed"
Not accurate — no implant treatment comes with a guarantee.
The Reality:
- Reported Success Rates: the literature commonly cites success rates in the 95–98% range under ideal conditions — good patient selection, an experienced surgeon, and favorable bone
- Real-World Outcomes: failed osseointegration, peri-implantitis, and mechanical issues remain possible, at the rates discussed earlier in this guide
- Biological Variability: bone metabolism, inflammatory response, and individual biology vary from patient to patient, so some level of risk is always present
Misconception 6: "All-on-6 Is Always Better Than All-on-4"
Not accurate — more implants doesn't automatically mean a better outcome.
The Reality:
- When Four Is Enough: with adequate bone and moderate chewing demands, four well-placed implants can deliver stable, lasting results
- When Bone Loss Is Advanced: even six implants may not be enough on their own, and additional grafting or surgical risk may still be needed
- The Real Principle: correct positioning and load distribution with four implants outperforms a poorly planned six-implant case
- Bottom Line: the right choice comes down to a thorough clinical evaluation, not simply the implant count
Misconception 7: "Smoking Doesn't Affect the Outcome"
Not accurate — technology doesn't cancel out the biological effects of smoking.
The Reality:
- Osseointegration: smoking is associated with meaningfully slower osseointegration and lower ISQ readings
- Infection Risk: smoking impairs immune response, which is linked to a higher risk of peri-implantitis
- Success Rates: heavy smokers tend to show lower overall success rates compared with non-smokers
- Recommendation: quitting smoking at least two weeks — ideally a full month — before surgery is generally advised
Patient Responsibilities and Expectations
Pre-Operative Responsibilities
- Choosing a Dentist: look for someone experienced in All-on-4/6 treatment who communicates clearly
- A Thorough Consultation: go over your systemic health, oral hygiene habits, and expectations in detail
- Financial Planning: confirm treatment cost, insurance coverage, and payment options ahead of time
- Preparing Beforehand: quit smoking and tighten up your oral hygiene routine
- Informed Consent: review and sign documentation covering the risks, possible complications, and alternative options
First Two Weeks Post-Operative
- Rest: limit physical activity; hold off on sports, heavy lifting, and long walks
- Diet: soft, lukewarm foods; avoid alcohol and smoking entirely
- Oral Hygiene: follow your dentist's instructions, and avoid aggressive brushing near the surgical site
- Dentist Appointments: attend all first-week follow-ups (typically 1–2 visits) for pressure-point adjustments
Long-Term Responsibilities
- Oral Hygiene: daily mechanical and chemical cleaning, including interdental care
- Dental Visits: every 3–6 months in year one, every 6 months in years two through five, and annually after that
- Lifestyle Adjustments: avoid very hard foods, and limit smoking and alcohol
- Financial Planning: budget for eventual prosthesis replacement or repair (roughly 5–15 years out)
Warning Signs: When to Contact Your Dentist
The following symptoms — especially if they persist beyond the first days or weeks after surgery — deserve prompt evaluation (within 24–48 hours):
Emergency Situations
- Ongoing Bleeding: bleeding that continues 4–6 hours after surgery despite gauze and pressure
- Severe Pain: pain that worsens on day 3 or 4, or doesn't respond to prescribed pain medication (possible infection)
- Fever/Malaise: a fever of 38°C (100.4°F) or higher, significant fatigue, or sweating (possible systemic infection)
- Difficulty Breathing or Swallowing: severe swelling or any sense of airway restriction — this is a medical emergency
- Sinus Symptoms: significant headache, nasal discharge, or pain over the cheekbone (possible sinus perforation)
Should Be Evaluated (Within 1–2 Days)
- Excessive Swelling: swelling that persists or worsens on day 3 or 4
- Gingival Margin Issues: torn sutures, a sagging flap, or continued bleeding
- Implant/Prosthesis Movement: a loose feeling, or any sense of movement at the implant head
- Numbness/Tingling: some numbness in the lip, chin, or tongue is expected initially, but if it lasts beyond two weeks, let your dentist know
- Drainage/Odor: yellow-green discharge or an unusual odor from the surgical site
Long-Term Monitoring (Weeks–Months)
- Implant Loosening: any sense of movement or clicking at the implant head
- Gingival Issues: redness, swelling, bleeding, or gum recession
- Prosthesis Movement: shifting during chewing or speaking
- Prosthesis Fracture: cracks, breaks, or sharp edges
- Eating Difficulties: pain with certain foods, or general discomfort with the prosthesis
- Aesthetic Concerns: discoloration or a darkened appearance at the gumline (a sign of possible recession)

Summary and Conclusion
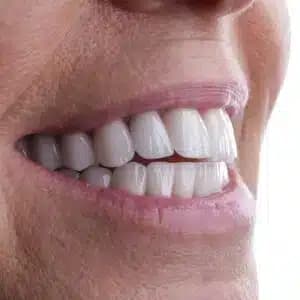
Under favorable conditions, All-on-4 and All-on-6 full-mouth implants can offer edentulous patients a more stable, functional, and socially confident alternative to removable dentures. Advances in technique and technology have made these approaches reliably predictable for many patients. Still, a few points are worth keeping in mind:
- Not Every Patient Is a Candidate: bone quality, systemic health, and oral hygiene habits all factor into candidacy
- It Isn't a One-Day Fix: surgery happens in a single session, but the full treatment typically spans 6–12 months
- Maintenance Is Ongoing: daily hygiene and regular dental visits are essential to long-term success
- Risks Are Real, If Uncommon: complications can occur, so realistic expectations matter
- Choosing the Right Dentist Matters: look for an experienced clinician who communicates clearly and uses proven techniques
When the clinical picture is favorable and the patient is committed to maintaining the result, All-on-4/6 treatment can meaningfully improve quality of life. The first step is a thorough consultation with an experienced implant dentist.

Your Next Step: A Personalised Assessment
This guide is educational and is not a substitute for an in-person clinical examination. Whether a treatment is right for you — and which approach makes sense — can only be confirmed by a qualified dentist who reviews your specific case, imaging and health history. If you are weighing your options, the most useful next step is a personalised assessment.
NexWell matches you to vetted partner clinics and can arrange a no-pressure free assessment of your situation.

Free Guide: The Complete Medical Tourism Handbook
Cost comparisons, clinic evaluation checklist, packing list & recovery tips — everything you need to plan your treatment in Turkey.
Related reading
dental
Dental Implants FAQ: Your Complete Guide to Treatment, Success, and Long-Term Care
A complete guide to dental implants: how they work, who's a candidate, the treatment process, recovery, cost factors, and long-term care.
dental
Long-Term Dental Implant Success: The Complete Care Guide to Preventing Peri-Implantitis
A complete dental implant care guide: healing timeline, daily hygiene routine, peri-implantitis prevention, risk factors, and warning signs to know.
dental
Dental Implant Myths vs. Facts: 12 Common Misconceptions Explained
Separate dental implant fact from fiction: pain, age limits, maintenance, titanium safety, and success rates, explained in plain, expert-reviewed terms.
dental
Bone Grafting and Sinus Lift: A Complete Guide to Procedure, Healing, and Recovery Timeline
A complete guide to bone grafting and sinus lift surgery for implants — anatomy, techniques, healing timeline, risks, and success factors.