Medically reviewed by Dt. Tunç Berge, MSc — Esthetic Dentistry & Implantology — Last reviewed June 2026
Dental Implant Surgery Step by Step: What Really Happens at Every Visit
A NexWell planning guide to the full dental implant journey, from your first consultation and CBCT scan to the final crown, with a calm walkthrough of each visit and how the timeline splits into two trips for dental-tourism patients.
Decision Context
Patients compare this treatment inside the trip around it
Treatment pages perform better when they acknowledge arrival flow, destination trust, and the recovery rhythm patients are trying to visualise before booking.

The provider decision starts with arrival confidence
Patients compare treatment pages while also asking how first-day logistics, transfers, and scheduling will actually work.

The destination still influences medical trust
A treatment page is stronger when it recognises that the city itself remains part of the decision frame for international patients.

Recovery pacing changes how people evaluate options
Different procedures feel more or less realistic depending on how patients picture the slower hours between appointments.
Step 1: Consultation, Imaging and Your Treatment Plan
Every implant journey begins not with a drill but with a conversation. At your first consultation, the dentist reviews your medical history, the medications you take, and your reasons for wanting to replace a missing tooth.
This matters more than people expect: conditions such as uncontrolled diabetes, certain medications, and smoking can all influence how predictably an implant heals, so an honest history helps your clinician plan around you rather than for an average patient.
Next comes a thorough clinical examination. The dentist looks at the gap itself, the health of neighbouring teeth, the condition of your gums, and how your jaws meet when you bite. They will gently check the width and height of bone where the implant would sit.
To see what the eye cannot, most clinics take a CBCT scan, a three-dimensional X-ray that reveals the jawbone in cross-section. This is the single most useful planning tool in modern implant dentistry, showing exactly where nerves, sinuses and existing roots lie, and how much bone density is available to anchor the implant.
With images and impressions in hand, your dentist designs a written treatment plan. This is where the abstract idea of getting dental implants becomes a concrete, staged sequence with dates, costs and decision points. The plan will state whether you need a single fixture or several, whether any preparatory work is required first, and roughly how many months the whole process should take.
If you are replacing just one tooth, the plan may be relatively simple; larger cases such as full mouth dental implants involve more planning and more visits.
What does this visit feel like? Reassuringly undramatic. There is no surgery and usually no needles, just examination, imaging and discussion. It is the ideal moment to ask questions: how many implants you need, which implant brands the clinic uses, what the recovery looks like, and what happens if healing is slower than hoped.
A good clinician will explain options rather than promise outcomes, because every mouth heals at its own pace. It also helps to understand which types of dental implants your case may call for.
For dental-tourism patients, much of this stage can begin remotely, with photographs and a scan from a local clinic reviewed before you travel, so your first in-person appointment in Turkey confirms a plan rather than starting from scratch.
Step 2: Preparing the Site, Extractions and Grafting
Not everyone needs preparatory work, but when they do, it usually happens before or alongside implant placement. The aim of this stage is simple: to make sure the implant has a healthy, stable foundation of bone and gum to integrate with. Skipping necessary groundwork to save time is a false economy, so a careful clinic will not rush it.
If the tooth being replaced is still present but failing, it must come out first. The timing of tooth extraction & timing relative to placement is a genuine clinical decision. Sometimes an implant can be placed into the socket the same day the tooth is removed; in other cases the dentist prefers to let the socket heal for a few weeks or months.
Your clinician chooses based on the condition of the bone, the position of the tooth and how much infection was present, so the same answer will not suit every patient.
When the jaw lacks enough bone to hold an implant securely, a bone graft may be recommended. Graft material, which can be your own bone or a sterile substitute, is placed where extra volume is needed and is gradually replaced by your own bone over several months.
In the upper back jaw, where the sinus cavity sits low, a sinus lift gently raises the sinus floor to create room for an implant of adequate length. Both procedures are routine for experienced surgeons, but both add healing time to the overall plan, which is why they are mapped out at the consultation stage rather than sprung on you later.
What does preparation feel like? Extractions and grafts are done under local anaesthetic, so you should feel pressure and movement but not sharp pain. Afterwards there is typically some swelling and tenderness for a few days, managed with simple pain relief and clear aftercare instructions. The harder part is patience: grafted sites often need three to six months to mature before an implant can be placed.
For dental-tourism patients, this is the stage most likely to require careful scheduling, because a graft done on your first trip may need months to heal before implants go in on a later visit. A transparent clinic will tell you upfront whether your case can be done in two trips or whether more time is needed.
Step 3: The Implant Placement Surgery
This is the step most people worry about, and it is usually far gentler than imagined. Implant placement is a routine outpatient procedure performed under local anaesthetic, the same kind used for a filling, so the area is fully numb and you remain awake and comfortable.
Patients who feel anxious can often be offered additional sedation; your clinic will discuss what is appropriate and safe for you rather than applying a one-size-fits-all approach.
The surgery itself is methodical. In the common flap technique, the surgeon makes a small opening in the gum to see the bone directly, prepares a precise channel, and threads the titanium implant into place like a tiny anchor. Where bone and gum conditions are favourable, a flapless approach may be possible, placing the implant through a small punch in the gum without lifting it, which can mean less swelling.
Whether single or multiple implants are placed, the principle is the same; placing several fixtures simply takes longer in the same appointment. Larger restorations such as All-on-4 use a small number of carefully angled implants to support a full arch, while a single tooth implant is a more contained procedure.
In some situations the dentist may attach a temporary tooth straight away, an approach known as immediate loading. This is not suitable for everyone and depends on how stable the implant feels at placement, so it is a judgement your surgeon makes in the moment rather than a guarantee made in advance. More often, the implant is left undisturbed to heal first.
What does it feel like? During the procedure you should feel pressure and vibration but not pain; tell your surgeon if you feel anything sharp and they will add more anaesthetic. Placing a single implant often takes only fifteen to thirty minutes.
Afterwards, the numbness wears off over a few hours and you may have mild soreness, minor swelling and perhaps a little bruising for a day or two, which most people manage comfortably with over-the-counter pain relief.
Detailed implant aftercare instructions cover rinsing, eating softly and keeping the site clean, and our guide on what to eat after surgery covers the recovery diet. Bleeding is usually minimal, and the experience tends to be far less eventful than the long build-up suggests.
If you are travelling for treatment, placement is the centrepiece of your first trip to Turkey.
Step 4: Healing and Osseointegration
Once the implant is placed, the most important work happens quietly, beneath the gum, where you cannot see it. This is osseointegration, the biological process in which living bone grows against and bonds to the surface of the titanium implant, gradually locking it into the jaw.
It is what transforms a placed implant into a foundation strong enough to chew on, and it cannot be hurried; it unfolds on the body's timetable, typically over several months.
How long does it take? Most implants need around three to six months to integrate, though the exact figure varies with the site, your bone quality and your general health. The lower jaw, which is denser, often heals faster than the softer upper jaw. Sites that involved grafting usually need longer. Rather than viewing this wait as wasted time, it helps to see it as the stage that makes everything afterwards reliable.
Lifestyle matters here too: smoking is consistently linked to slower, less predictable healing, because nicotine interferes with the bone cells that drive integration, which is one reason clinicians ask so directly about it.
During this healing window you are rarely left with a visible gap if the tooth is in a smile zone. Your dentist may fit a temporary tooth, a small removable denture or a provisional restoration so you can talk and smile normally while the implant integrates underneath.
These temporaries are designed to be gentle on the healing site, so they may feel less solid than your final tooth will; that is intentional, not a sign anything is wrong.
What do these months feel like? After the first week or two of mild tenderness, most people simply forget the implant is there. There are no daily dressings to manage and no constant discomfort, just a periodic check so the dentist can confirm healing is on track. For dental-tourism patients, this stage is the natural break between trips.
You return home, get on with normal life for a few months, and the implant integrates while you do, which is precisely why the journey usually splits into two trips rather than one extended stay. Your clinic should give you clear signs to watch for and a point of contact in case anything feels off while you are away.
Step 5: Abutment, Impressions and Designing Your Tooth
When your dentist confirms the implant has integrated, the focus shifts from biology to craftsmanship: building the visible tooth that sits on top. This stage is shorter and gentler than placement, and it is where your new tooth starts to take shape.
The first task is to connect the implant to the outside world with an abutment, a small connector that screws into the implant and protrudes slightly through the gum. If your implant was placed under the gum to heal undisturbed, a brief, minor procedure under local anaesthetic uncovers it and fits the abutment or a healing cap.
This lets the gum tissue settle into a natural-looking collar around what will become your tooth. The discomfort here is usually minimal, often less than the original placement, because no bone work is involved.
Once the gum has shaped nicely around the abutment, your dentist takes an impression, either a physical mould or a digital scan with a small intraoral camera. This captures the exact position of the implant, the contour of your gum and the shape of neighbouring and opposing teeth, so the laboratory can build a restoration that fits your bite precisely.
Shade matching happens here too: the dentist compares samples against your natural teeth so the final tooth blends in rather than standing out, which is the difference between a tooth that looks restored and one that simply looks like yours.
The impression goes to a dental laboratory, where skilled technicians fabricate your final restoration. Depending on the case, this may be a single crown, part of a bridge, or a larger structure for a full arch.
The choice of materials and design for dental crowns balances strength, appearance and how the tooth will function under everyday chewing, and your dentist will explain the options rather than decide silently on your behalf.
What does this visit feel like? Generally easy and even encouraging, because this is when an abstract plan becomes a tooth you can picture. There may be brief numbness if the abutment needs uncovering, but many patients describe these appointments as more like detailed dental check-ups than surgery.
For dental-tourism patients, the abutment, impression and final fitting are usually grouped into the second trip, so that one set of travel covers the finishing stages efficiently rather than requiring repeated long-haul visits.
Step 6: Fitting the Final Tooth and the Two-Trip Timeline
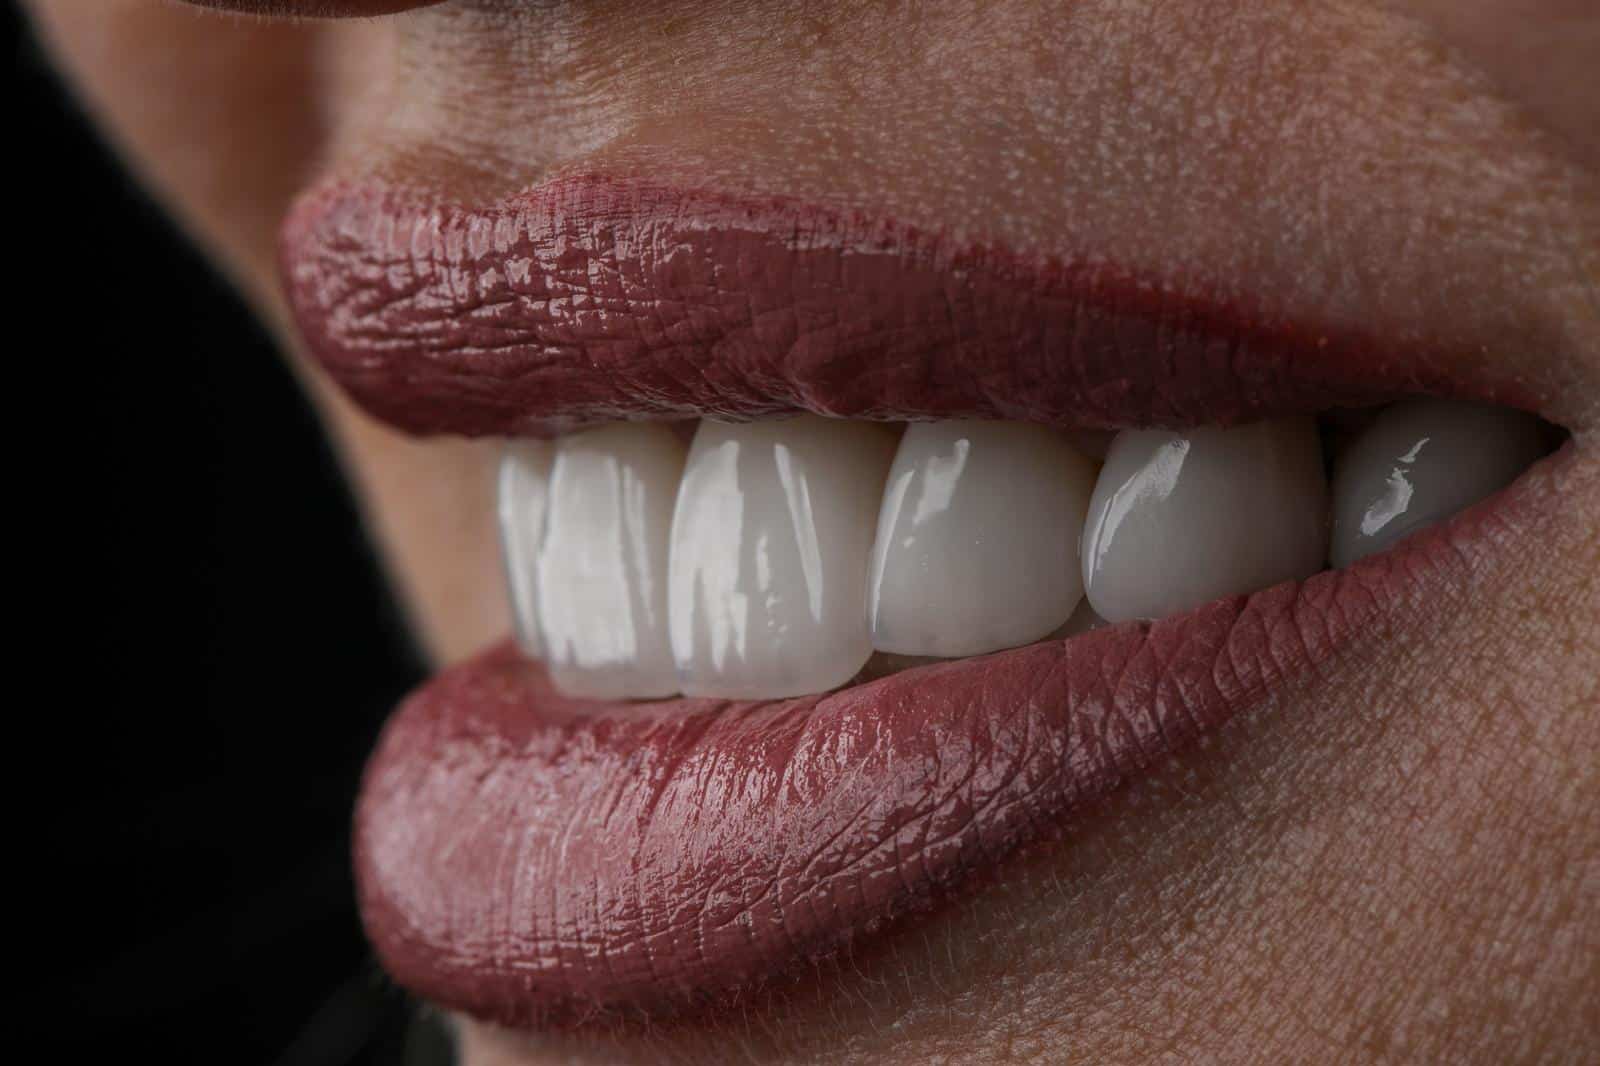
The final visit is the one everyone looks forward to: fitting the finished crown, bridge or arch onto your integrated implant. Your dentist removes any temporary, checks the new restoration against your bite, and makes small adjustments so it meets the opposing teeth comfortably.
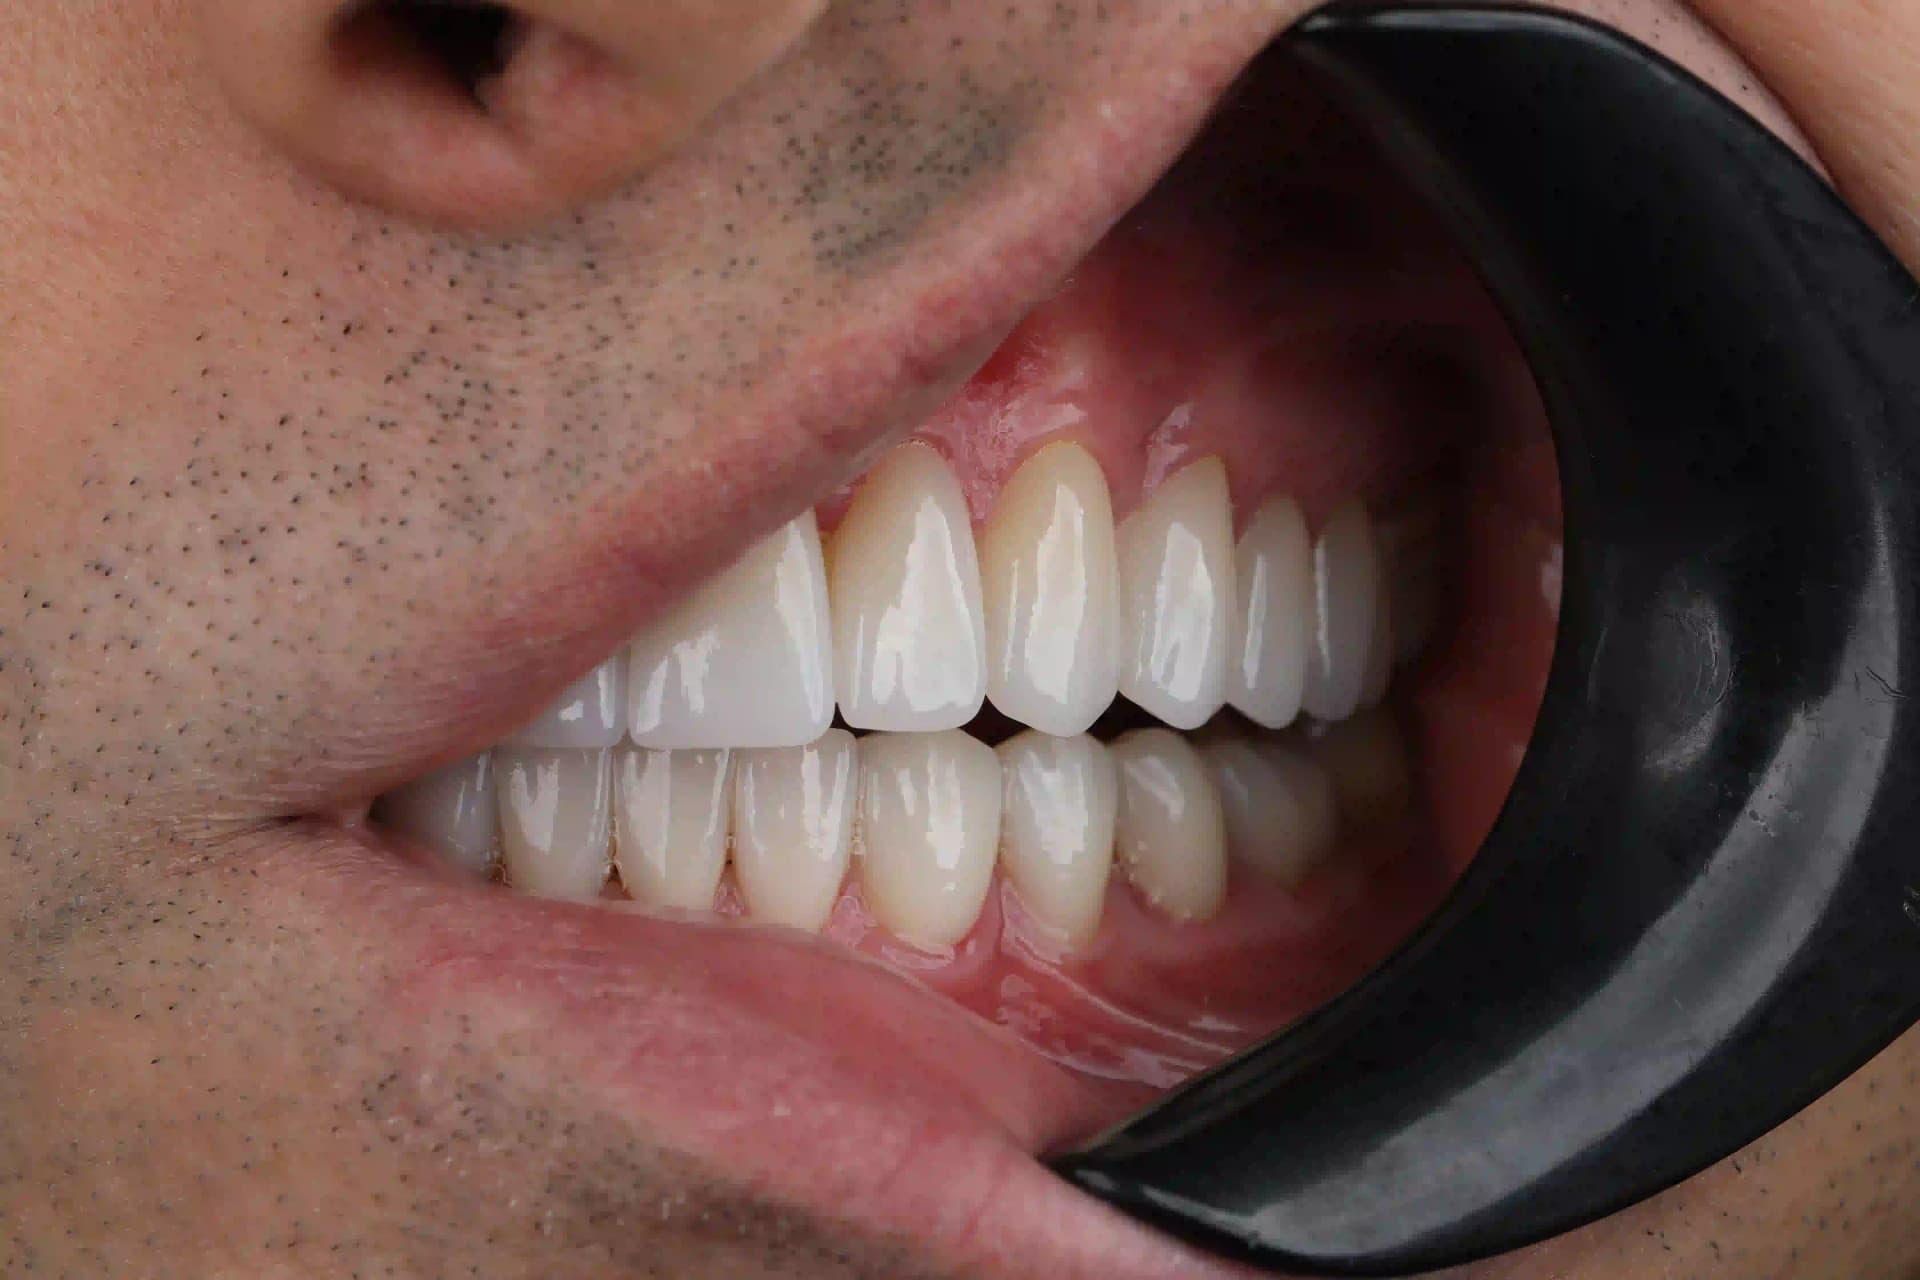
A single crown is either screwed directly into the implant or cemented onto the abutment; larger restorations are secured according to their design. When everything sits correctly, the tooth is tightened into place, polished, and the result is a replacement that looks and works like a natural tooth.
What does fitting feel like? Usually quick and painless, often without any anaesthetic at all, because the work is on the restoration rather than your tissues. You will be asked to bite, tap and grind gently so the dentist can confirm nothing feels high; speak up if it does, as fine adjustments at this stage make all the difference to long-term comfort.
Many patients are surprised at how immediately normal the tooth feels.
From here, the implant moves into long-term life, and how you care for it shapes its future. Good peri-implant care and routine checks help keep the surrounding gum and bone healthy, which is central to understanding how long do implants last.
No clinician can promise a fixed lifespan for any individual, but well-maintained implants have an excellent track record over many years.
For dental-tourism patients, the whole journey typically splits into two trips around the long healing pause. The first trip covers consultation, any preparation and the placement surgery. You then heal at home for roughly three to six months. The second trip handles the abutment, impressions and final fitting.
Resources on planning your dental trip and on whether the destination is it safe are worth reading early, so the logistics feel as calm and predictable as the clinical steps themselves.
Questions Patients Ask Before They Commit
Related reading
Treatment Guide
Types of Dental Implants: A Complete Guide to Designs, Materials and How Clinicians Choose
Endosteal, subperiosteal, zygomatic and mini implants, plus titanium vs zirconia and one- vs two-piece — the main implant types and how clinicians choose.

dental
Dental Implants in Turkey
Replace a single tooth or your entire smile with premium dental implants in Istanbul. Same brands as London specialists, a fraction of the cost. 5-day treatment packages. JCI-accredited dental hospitals.
Treatment Guide
What to Eat After Dental Implant Surgery: A Recovery Diet Guide
A practical recovery-diet guide: the first 48 hours, soft-food stages, foods to avoid, nutrition for healing, and special notes for full-arch patients.
Treatment Guide
Dental Implant Healing and Aftercare: What to Expect
Recovery timeline, what to eat, hygiene, warning signs to call your clinic, and why smoking affects healing.
Plan the next step clearly
Use this page as a decision-support guide, then move into quote review, treatment comparison, and travel planning with coordinator support.